Blazin’ Buffalo Chicken Sandwiches

buffalo chicken sandwich

I love wings!! It’s becoming an obsession, really. Almost every week I get a craving for them. There are two local places that are my favorite – one has the best fried wings with great non-traditional sauces and the other has these great dry-rubbed and baked wings. Both are amazing! I also really love buffalo chicken sandwiches, wraps and salads. I’d almost eat anything that was dipped in buffalo wing sauce, which is quite embarrassing. So I decided that I had to figure out a great tasting recipe to make at home.

Something to note about this recipe – this is not your traditional buffalo wing sauce. If you are looking for a classic “medium wing sauce” flavor then grab a bottle of Franks and have at it. That would be too boring for me and not what I’m going for. One of my favorite wing joints has this sauce that is a combination of a traditional BBQ sauce and wing sauce with a little sweetness and its to die for. I have also played around with a spicy Asian inspired wing sauce as well as a lemon pepper sauce but haven’t perfected those quite yet.

wing sauce

Helpful hints: Since most chicken breasts you find in the store are HUGE there are a few different ways to make sure your sandwich is not this giant hunk of chicken you cant even bite. 1 – use chicken tenders, 2 – use chicken breast fillets (or thin sliced breast pieces), 3 – buy chicken breasts and cut them in half butterfly style, 4 – buy small chicken breast portions and pound them thinner to even them out. I personally prefer option 1 as it is easiest and the most tender.

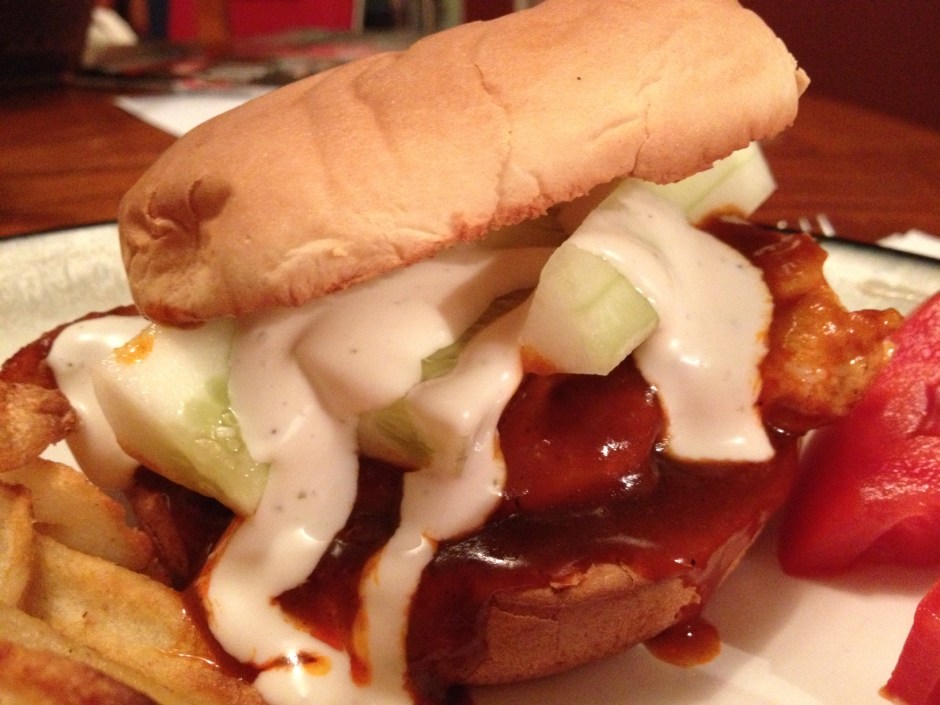
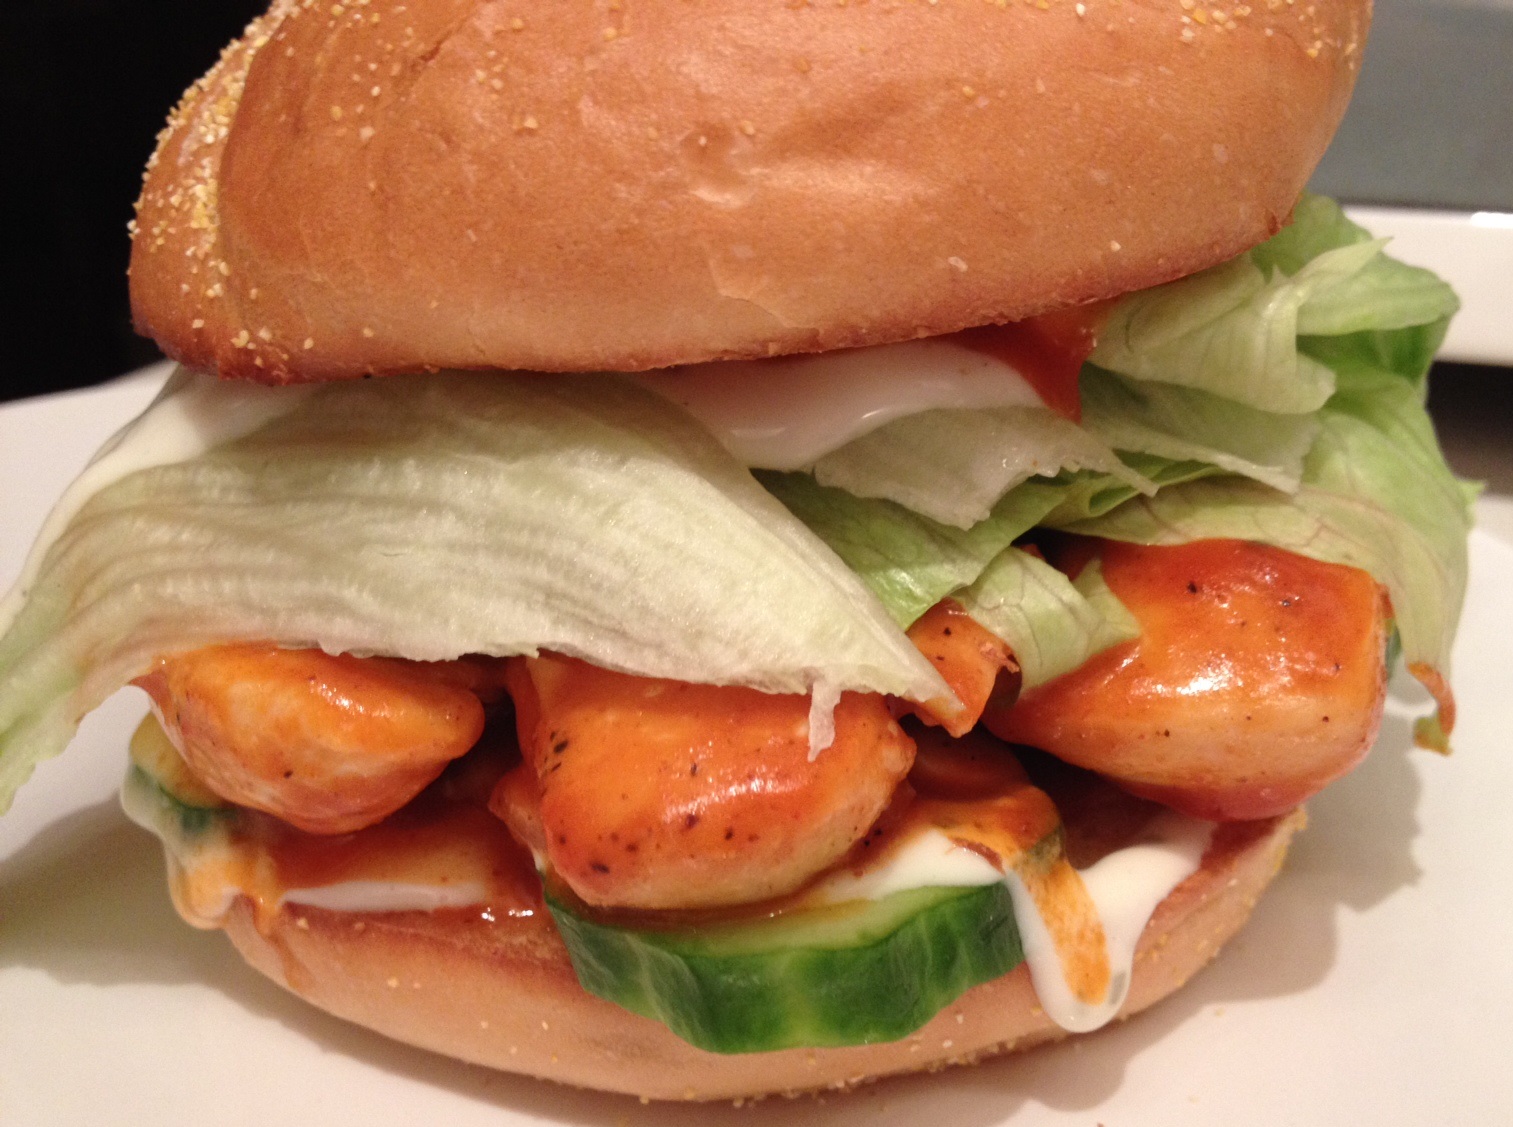
I love topping these sandwiches with ranch dressing, lettuce and cucumber slices. Just remember to have extra napkins at the ready because this is a messy one! But oh so tasty!!

buff chicken 3

Blazin’ Buffalo Chicken Sandwiches

Ingredients

**Makes 4 sandwiches
chicken breast tenders (about 2-3 per sandwich)
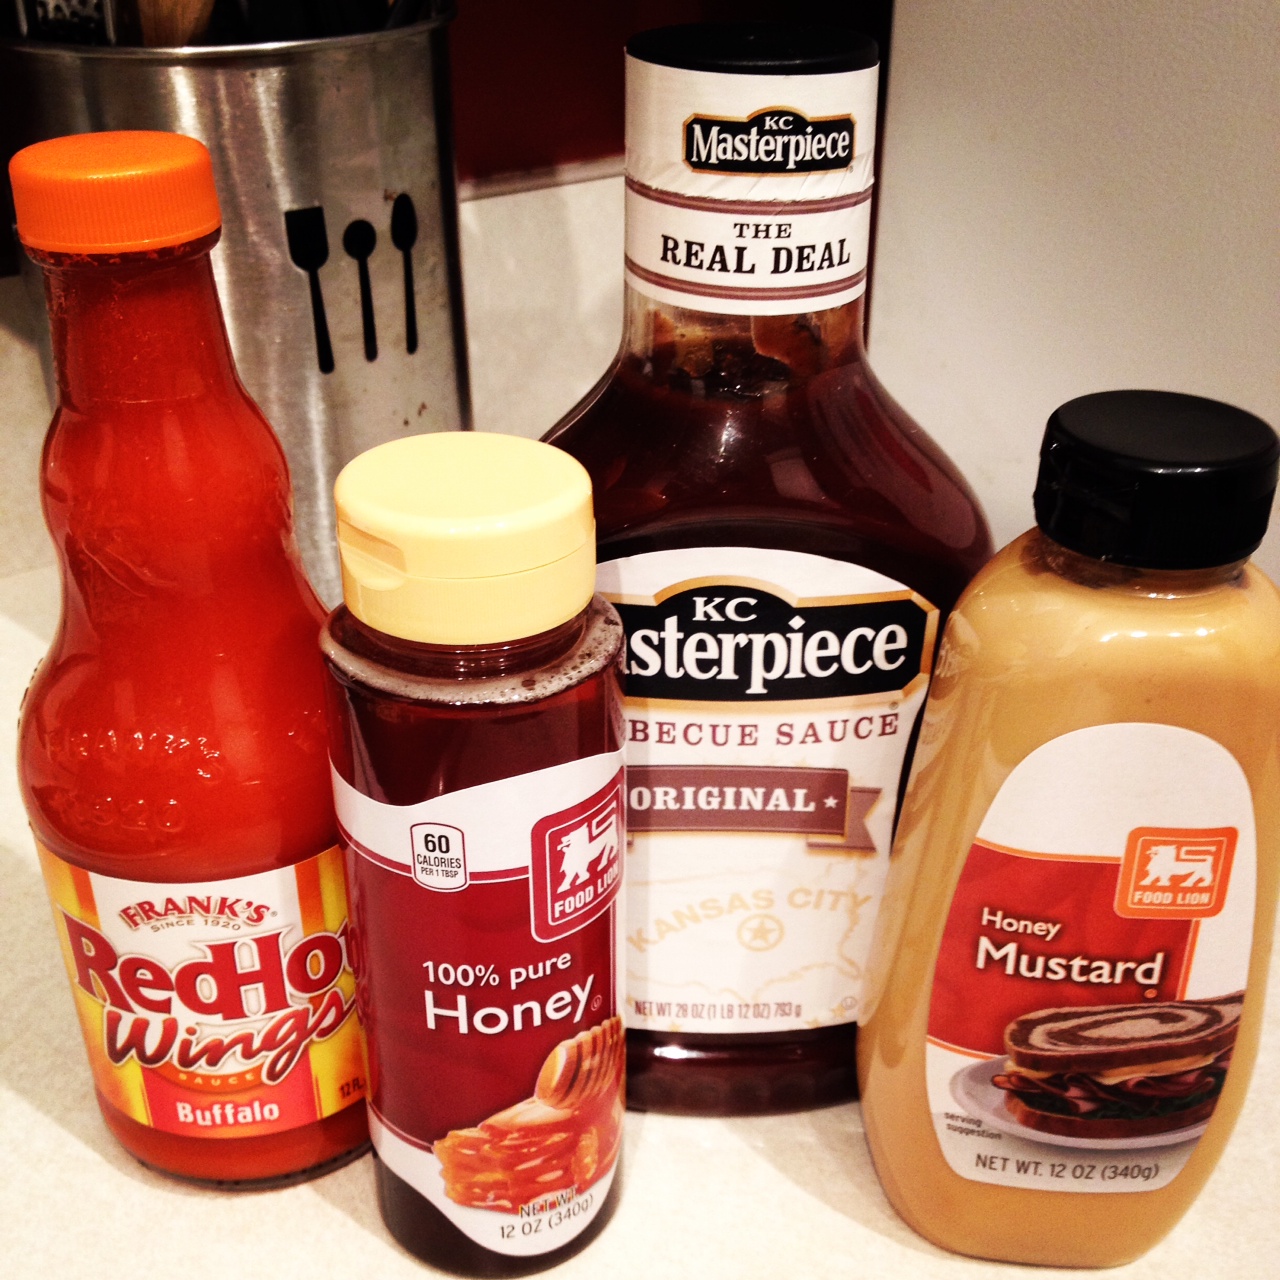
1 cup of Frank’s Wing Sauce
1/2 cup BBQ sauce
3 tablespoons of honey mustard
2 tablespoons of honey
4 sandwich buns
cucumber, ranch, etc. for topping

Directions

In a large skillet, cast iron preferred, heated to medium high heat, add a few tabs of butter or teaspoons of oil and cook your chicken tenders until browned and cooked through.  Remove the chicken from the pan and set aside. Reduce the head to medium low.

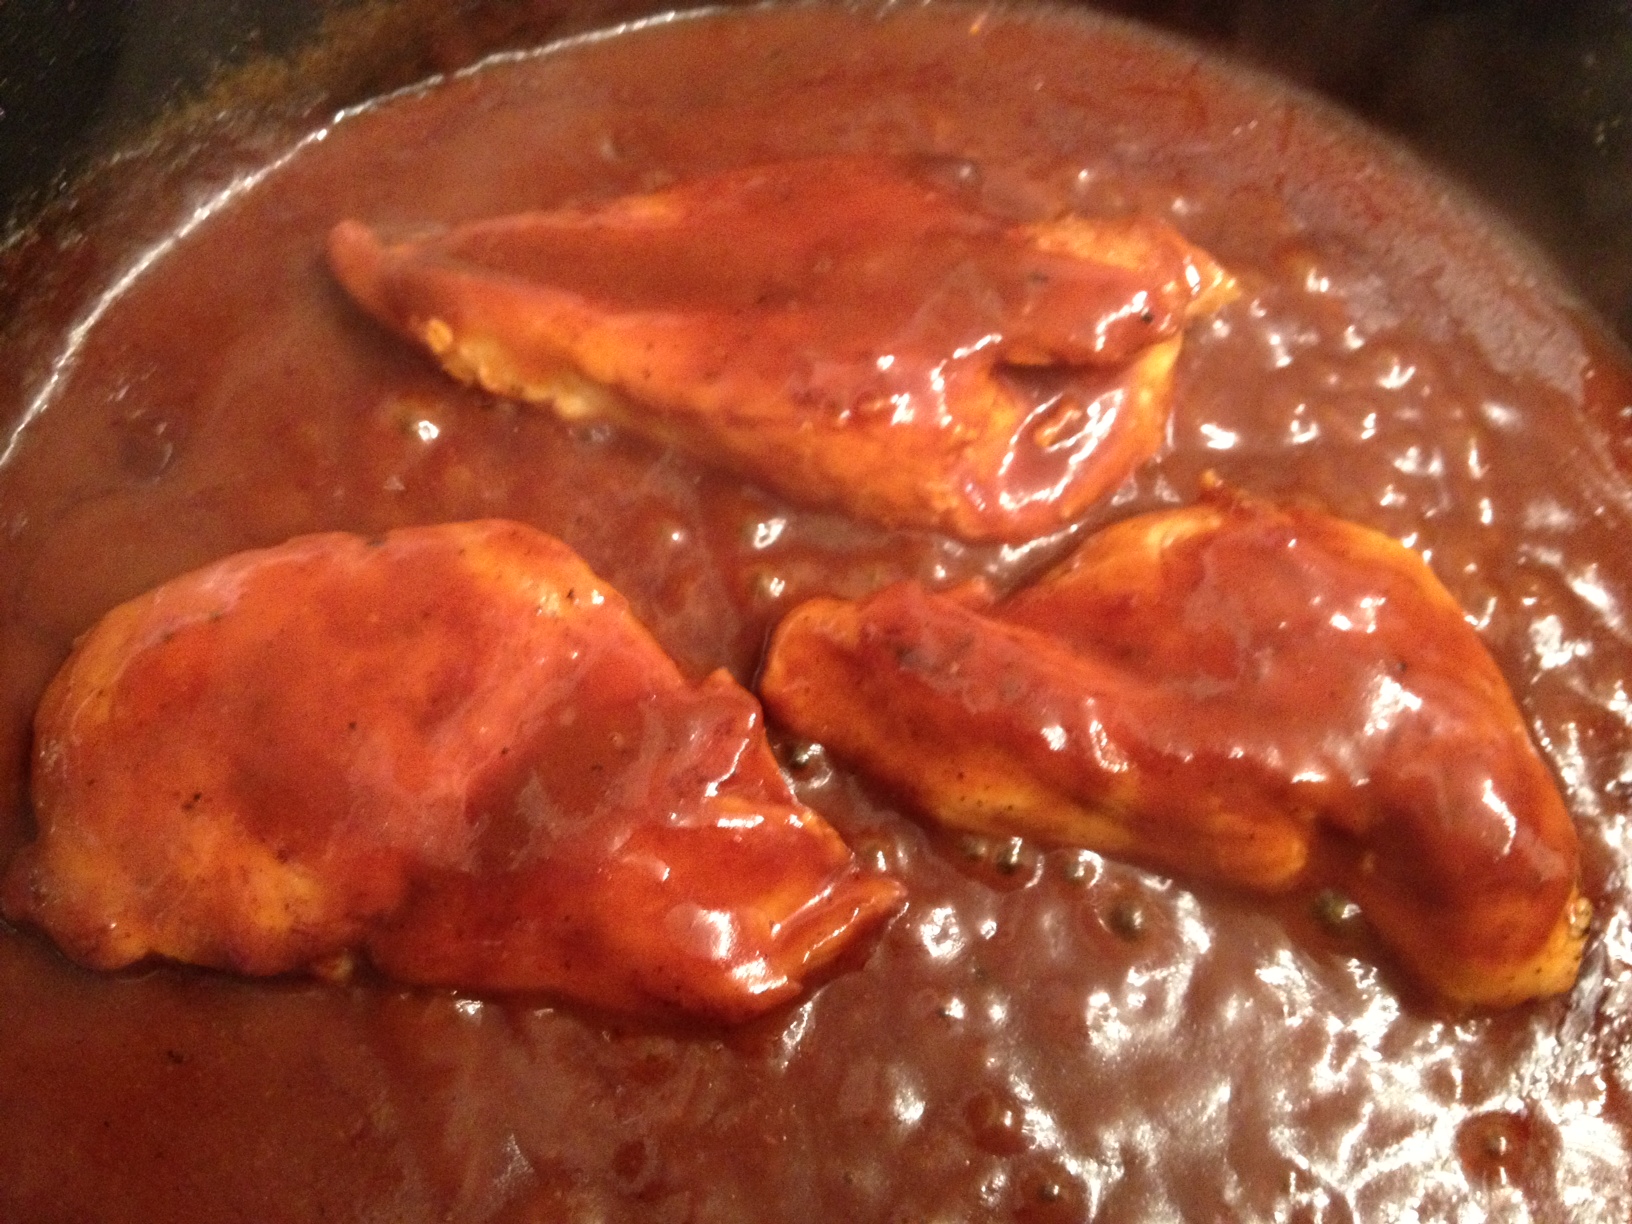
Add in the sauce ingredients starting with the Franks and ending with honey. Taste the sauce and adjust the flavors as needed. Once sauce starts to bubble, let it reduce and thicken for a few minutes then add the chicken tenders back to the skillet. Turn the chicken over a few times to coat thoroughly in sauce.

Place the chicken tenders on a toasted bun and add your favorite toppings. Spoon additional wing sauce over the chicken if desired.

Enjoy!

Much Love,
M

Chicken Fajitas

fajitas

Anyone who knows me knows I LOVE Mexican food! Not only is it pretty easy and cheap to make, its also REALLY REALLY GOOD! When ever I’m out at a Mexican restaurant, one of my favorite things to see being delivered to a table is fajitas! They are so fun to hear sizzling and they smell delicious! So I then started my quest to find a good “make at home” recipe.

This recipe is a no-fuss recipe. If you want to get all fancy with the sizzling skillet and all that jazz, feel free! Usually I’m so hungry and drooling during the cooking process that I want immediate gratification so straight from the pan to my plate they go. Also, the seasonings are approximate and can be adjusted according to how bold you want your flavor.  If you don’t have the spices on had at home, feel free to use a package of taco or fajita seasoning – I just prefer to steer clear of those due to the preservatives and sodium. Here’s how to make em’!

Chicken Fajitas

Ingredients

2-4 boneless skinless chicken breasts, cut into thin strips

1 red and green bell pepper, seeded and cut into strips

1 large or two medium onions, cut in half and then sliced

vegetable oil

seasoning  (mix 1 tbsp chili powder, 2 tsp cumin, 1 tsp garlic powder, dash of red pepper flakes, dash of oregano)

tortilla shells

toppings (sour cream, guacamole, lettuce, cheese, salsa, etc.)

Directions

In a large skillet heated to medium-high, drizzle a little bit of veggie oil (enough to very thinly coat the pan) and add the chicken strips.

Add the peppers and onions to the chicken, sprinkle the seasoning mixture on top, and then toss around to combine.

Saute the chicken and veggies until the chicken is cooked through and the peppers/onions start to soften but still remain slightly crisp.

Add the cooked and seasoned chicken/pepper/onion mixture to the center of warm tortillas and top with your favorite toppings.

Serve with Cold Tex Mex Succotash for extra fun!

Enjoy!

Much Love,

M

Greek Chicken Pitas

greek pitas

I love Greek salads!! But sometimes a salad for dinner is just not going to cut it. Enter this recipe. Greek Chicken pitas are the perfect combination of sandwich and salad.

A few things to note about this recipe: If you can grill your chicken, DO IT! If you don’t have time or don’t have a grill you can do one of two things – buy pre-grilled chicken or brown some boneless/skinless chicken in a skillet and slice it. If you are going to grill the chicken, I found it best to marinate the chicken in the Greek dressing to bump up the flavor. Always allow your meat to rest before you slice it. I like to serve the chicken warm in the pita because of the nice contrast from the cold, crisp veggies. And even though this recipe says “pita” i also found it best to use flat-bread as it held up better and had a bit more chew to it. I also like to warm and season my flat-bread by simply brushing it with olive oil and sprinkling it with salt and garlic powder and putting it in a warm oven for a few minutes. All these are just my personal preferences but feel free to do whatever. And if you want to skip the bread entirely, knock yourself out and enjoy a great Greek chicken salad.

Greek Chicken Pitas

Ingredients

grilled chicken, cut into strips

flat-bread

Romain lettuce

diced tomatoes

diced cucumber

diced red onion

feta cheese

kalamata olives

Greek dressing

Directions

Fill the center of each pita with Romain lettuce, then top with grilled chicken, tomatoes, cucumber, onions, feta cheese and olives then drizzle with Greek dressing.

Serve with a hummus or a fun orzo or pasta salad to make it a total Mediterranean experience!

Enjoy!

Much Love,

M

Grilled Steak & Leftover Steak Sandwiches

steaksand4

Perhaps one of the the greatest things about grilling London broil is the leftover meat! Wait, what?! This coming from the founder and chair of the “I hate leftovers club”? Yes ma’am! I love having left over grilled London broil just so I can make these steak sandwiches!

steaksand2

Leftover Grilled Steak Sandwiches

Ingredients

leftover grilled steak, sliced and cut into strips

hoagie or kaiser buns

videlia onions, diced or sliced

cheddar cheese

Worcestershire sauce

A1 Steak Sauce

Directions

In a small skillet saute the onions until caramelized.

In another skillet, combine the steak with enough A1 Steak Sauce and Worcestershire sauce to generously coat the steak.

Meanwhile, slice the buns and place them face down on a baking sheet in a 400° oven to get a little crispy.

After the buns have gotten slightly toasty put a slice of cheddar cheese on each half of the bun and return to the oven to get bubbly.

When the cheese has melted, add a spoonful of the steak on the bottom bun and top with caramelized onions and the other half of the bun.

Serve with steak fries.

Enjoy!

Much Love,

M

Blackened Salmon Caesar Salad

salmon caesar

I try to eat fish about once a week because of how good it is for you, but it gets boring. One way to to make fish more interesting is to make it spicy. Enter blackened salmon! My favorite way to have blackened salmon is on top of a creamy Caesar salad. Something about the creamy dressing and the Parmesan cheese really works with the spicy salmon.

The secret to this easy recipe is using quality ingredients. You really can’t skimp with this recipe. I prefer the Simply Caesar dressing found in the produce section of the grocery. Also, make sure you use the shredded Parmesan cheese and not the powdered stuff. You don’t need to get too fancy and buy a block (you can if you want to) but the pre-shredded Parmesan in the deli will work perfectly. For the salmon you will want to get a good quality dark red salmon. If you can find wild-caught instead of farm-raised that’s even better! And for the cajun spice, I am spoiled with this great Gullah seasoning my family gets when we visit Charleston, SC. You can buy it online here or you can just grab what ever your grocery store has for Cajun or blackening seasoning.

Blackened Salmon Caesar Salad

Ingredients

salmon filets

Cajun spice (blackening spice)

romaine lettuce

shredded Parmesan cheese

crutons

Caesar dressing

Directions

On a greased baking sheet, lay down the salmon filets (skin side down if it has skin), spray the tops with cooking spray, and sprinkle each piece with a geneous amount of the seasoning.

Bake the salmon at 375° for 15-30 minutes, depending on the thickness of your filet, until it flakes with a fork.

While the salmon is baking, in a large mixing bowl add in the following order: dressing, Parmesan, romaine lettuce, and croutons. Using tongs, toss the salad until the dressing evenly coats all of the romaine lettuce pieces.

When the fish is done, top each salad with a blackened filet. Garnish with more Parmesan and a lemon slice.

Enjoy!

Much Love,

M

Loaded Veggie Lo Mein

lo mein

I love ordering Chinese take-out! But sometimes all the MSG, other preservatives/additives, and extra sodium can cause me to get migraines. So I wanted to find a way to enjoy a healthier version of one of my take-out favorites at home where I could control the ingredients. This is one of the few if not the only vegetarian dish I make regularly and I’m telling you, you don’t miss the meat at all! And you can make this dinner even better by serving it with chop sticks and fortune cookies for a fun night of Chinese take-out at home!

Everything Lo Mein

Ingredients

Sauce:
1/4 cup of hoisin sauce

1/4 cup of soy sauce

1 teaspoon siracha, or more if desired

1 teaspoon of rice wine vinegar

1/4 teaspoon of sesame oil

Lo Mein:
1 pound spaghetti

1-2 tablespoons vegetable oil

1 tablespoon of minced ginger

1 tablespoon of minced garlic

1 red bell pepper, sliced

1-2 cups of carrot shreds

1-2 cups of snow peas or sugar snap peas

1 small can sliced water chestnuts, drained

1 can of bean sprouts, drained

1 can of baby corn, drained

1 can of bamboo shoots

1 head of napa, savoy, or bok choy cabbage, shredded/sliced

Directions

Mix together sauce ingredients and reserve.

Bring pasta water to a boil, salt water and cook spaghetti to al dente.

While pasta cooks, heat a tablespoon of vegetable oil in a LARGE, nonstick skillet over medium high heat. When oil ripples, add ginger, garlic, and veggies. Stir-fry veggies 2-5 minutes, or until just slightly tender but still crisp, then pour sauce over the veggies and stir to combine.

In a large mixing bowl, dump in the cooked and drained spaghetti noodles then pour the veggie and sauce mixture over the noodles and toss gently together with tongs.

*Note: This recipe makes a TON of lo mein so make it for a crowd or plan to enjoy the left-overs!

lo mein 2

Much Love,

M

Perfect Pimento Cheese

pimento cheese

Pimento Cheese – perhaps the greatest culinary gift from the south! Along with fried chicken, biscuits, collard greens, pulled pork BBQ, fried okra, corn bread, fried pickles, banana pudding…. OK, the list goes on forever! But seriously, pimento cheese is awesome! Not only is it absolutely scrumptious but it has a really cool history!

There is a big debate as to the exact origins of pimento cheese but one thing people agree on is that it came from the south, with a strong connection to the Carolinas – some even say North Carolina! Some scholars think pimento cheese dates back into the late 1800s but the earliest printed recipe found was from an Asheville cookbook called “The Queen of Appalachia Cookbook,” around 1910. When Pimento cheese first appeared in the early 1900’s, it was served as dainty crust-less sandwiches at tea parties to the upper-class society. Pimento cheese sandwiches were regarded as a delicacy due to the high cost of cheese and pimiento peppers imported from Spain. After James Lewis Kraft sold the first processed cheese in 1915 and southern farmers began growing pimento peppers, the cost of the pimento cheese dropped, sealing its fate as classic southern staple.  Pimento cheese fully transitioned from an upper-class delicacy to a working class lunch during the Great Depression, when cheese was a cheap form of protein. Ever since then, southerners have been slathering the stuff on white bread and spreading it over crackers and celery for decades! Since pimento cheese’s popularity has gone national and with publications like Bon Appetit and Nation’s Restaurant News declaring pimento cheese the hot food trend, now you see it on burgers, hotdogs, and BLT’s, fried into balls, made into dip, put into Mac and Cheese, grits, deviled eggs, and grilled cheese sandwiches.

Regardless of how popular pimento cheese gets or how creative people get with it, most southerners are a little persnickety with their pimento cheese and find the familiarity of the same recipe comforting. There was even a crisis at The Masters Tournament when the recipe got changed. Pimento cheese is just one of those things that when you find a good recipe, you stick with it. And this recipe is a good one!

One thing to note about pimento cheese – its all about the simplicity and letting the ingredients shine. So please for the love of all things southern and holy, use good quality mayonnaise! If you were planning to use Miracle Whip or some other brand of mayo-ish like products, just stop, put the cheese back in the fridge, and go but some real mayo! Please 🙂 Also, the colder the cheese is, the easier it is to grate.

Perfect Pimento Cheese

Ingredients

1 8oz block of sharp cheddar cheese

1 80z block of mild cheddar cheese

1 8oz block of sharp white cheddar cheese

1 8oz block of pepper jack cheese

2 4oz jars of diced pimentos, drained

1/2-1 cup of good quality mayonnaise (Dukes preferred)

cracked black pepper, to taste

cayenne or red pepper, to taste (optional)

Directions

Using a coarse cheese grater, shred the cheeses into large coarse shreds. (If you have a greater attachment for your food processor, feel free to use that.)

In a large mixing bowl toss the shredded cheeses with the drained pimentos.

Sprinkle the cheese mixture with the fresh cracked black pepper and a pinch of two of cayenne pepper (if you like spice) and toss.

Starting with 1/2 cup, add in your mayo just until the cheese comes together. If you prefer a more spreadable pimento cheese, feel free to add more mayo.

Store in the refrigerator and serve on white bread, with crackers and celery, or any other way you like it!

Enjoy!

Much Love,

M

Easy Herb Garden

herbs4

I love having easy access to fresh herbs! Most dried herbs are several months sometimes even years old! GROSS! Why use that stuff when you can easily grow your own tasty fresh herbs!

You don’t have a garden? No problem! Neither do I! I live in a townhouse in a neighborhood that has a pretty strict HOA so planting anything other than the approved shrubberies really isn’t a good idea. Even if you were to get the approval, the landscapers are likely to weed-whack everything to the root. Professionals? I think not!

I digress…

Back to my patio herb garden…

What you’ll need to recreate it:

  • Baker’s rack
  • Pots
  • Potting Soil
  • Herb plants

Equipment: I decided to use a baker’s rack – which I got as a hand-me-down (you can find some cheap ones at yard sales, flea malls, and on Craigslist) – because it would allow me to have several plants in a limited space. I purchased some plastic faux-terra cotta pots in both trough and single pot shapes. I would prefer the trough shape but invasive plants such as mint require their own pot so they don’t choke out other herbs.

herbs3

What to plant: I generally plant the same herbs each year – rosemary, basil, mint, thyme, dill, oregano, cilantro, sage, and flat-leaf parsley – as these are the herbs that I use most frequently in my cooking. I sometimes will have a separate pot with chives when I can find them but this year I haven’t had any luck yet. I also have a separate trough for perfume lavender – just because it smells good but you also can use it in your cooking! Hello herbs de Provence!

lav

Basics: Make sure your pots have good drainage and that they get adequate sunlight and water. I will gently mist my herbs each evening. Don’t put them in full sun as they will bake and die out. Fragile herbs like dill and cilantro need some shade. I’d say early morning or late afternoon sun is the best. Never water plants in the heat of the day under full sun because they will steam.

herbs2

Harvesting: Most times I just head out to my herbs with some kitchen scissors and get to snipping. If you want to get persnickety with ’em, feel free.  Basil for instance will bush out if you cut it a certain way – same for rosemary. Just Google for more info on that…

herbs1

Bottom line: Find some pots, get some herbs and get to planting! Its so rewarding and tasty to use your own home grown herbs in your cooking!

Much Love,

M

Chicken Sausage Sandwiches with Peppers & Onions

sausagesand

Let me start by saying that in general, I’m not a fan of sandwiches. Don’t get me wrong, burgers are great, BLT’s are tasty, and grilled cheese sandwiches got me through college, but anything else between two pieces of bread just makes me want to just have water and wait for the next meal. That being said, I LOVE THESE SAUSAGE SANDWICHES!!

After a trip to our State Fair in the fall and munching on a great sausage and pepper sandwich, I decided to try and make them at home. After several tasty attempts, I’ve finally decided on a recipe that is both full in flavor and light on fat and calories!

Normally when I make these sandwiches I like to use the smoked chicken sausage to cut out a lot of necessary fat and calories. If you are the “go big or go home” type, feel free to use a full fat bratwurst or kielbasa sausage. For buns, I like to use the smaller hoagie buns from my grocer’s bakery as opposed to bigger sub rolls – no need for all that bread because its what’s inside the bread that counts! For the peppers and onions, I like to use a vidalia onion and sweet red pepper. They just taste better to me. If you can’t find red then a yellow or orange will work. In a pinch a green pepper will do but it just wont have the same sweet taste. I also like to cut the sausage into disks so that each piece can get a little brown and crunchy and full of flavor. Also, cutting the sausage this way can also help you stretch a buck. 🙂

Bumping up the flavor: You can saute the peppers and onions in some beer for an even better flavor!

Switching it up: If you like Italian flavors, you can make this sandwich using Italian sausage (keeping the links whole) and topping the sandwiches with marinara and mozzarella along with the peppers and onion.

Chicken Sausage Sandwiches with Sauteed Peppers and Onions

Ingredients

1 package of sausage (Smoked Chicken Sausage preferred)

1 large vidialia onion, cut into quarters and sliced

1 large sweet red bell pepper, seeded, quartered, and sliced

1 package of deli hoagie buns

sauerkraut and mustard for topping

Directions

Drizzle a nonstick skillet headed to medium with canola oil and saute the peppers and onions until translucent and caramelized.

Meanwhile, in another skillet heated to medium, saute the sausage disks until they start to get nice and brown with color (or until they are warm if you aren’t a fan of flavor).

Toast your hoagie buns until they are warm and starting to get crispy.

Fill each bun with the sausage disks, sauteed peppers and onions, and then top with sauerkraut and mustard.

Enjoy!

Note: Recipe makes 4 sandwiches, each with ~380-400 calories

Much Love,

M

Chicken Quesadillas

quesa3

I love Mexican food! But sometimes I want to get my Mexican fix without leaving the house and saving a few bucks. Enter these easy chicken quesadillas.

For this recipe, I use my Crock-Pot Mexican Chicken (recipe found here) as the main ingredient. With the peppers, onions, tomatoes, and spices already in the chicken, all you need is cheese!! As any Mexican food connoisseur knows, queso is where its at! For this recipe, don’t buy the pre-shredded cheese – it just doesn’t melt right (plus it has some gross ingredients). Instead, buy the block of Monterrey jack cheese, grab a grater, and get to shreddin’!

Chicken Quesadillas

Ingredients

1 crock pot of Mexican Chicken

1 lb block of pepper-jack cheese, shredded

1 package of 8” tortillas (prefer whole wheat)

Directions

In a non-stick skillet heated to medium, lay down 1 tortilla shell.

Sprinkle shell with the shredded cheese, making sure to cover the shell with plenty of cheese.

As the cheese melts, put 1/8th of the Crock-pot Mexican Chicken on 1/2 of the cheesy tortilla shell.

When the cheese is melted and starting to bubble, flip the plain cheese half of the tortilla over the half with the chicken and press down to seal.

Flip the quesadilla over to make sure both sides are golden brown and crunchy.

Place the quesadilla on a cutting board and with a sharp knife, cut into 4 wedges.

Top with sour cream and serve immediately!

Enjoy!

*Note: Depending on the tortilla shell you use, with 2 oz of shredded Monterrey Jack cheese and 1/8th of the chicken mixture, each quesadilla is about 300 calories. You can save more calories by using whole wheat, lite, or low carb shells.

Much Love,

M